AndroidStudioでアプリ作成(1)Layout Editor
![]()
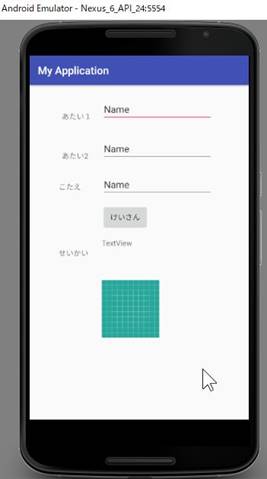
算数自習アプリを例にアプリ作成を学ぶ(calesakusei1)
1.空のアプリ(Hello World!)を作成する。
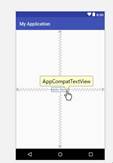
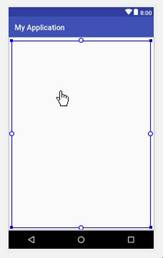
①下図のDesignが作成される。
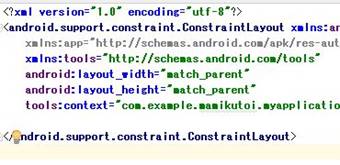
②このデザインのxmlファイルは以下の通り
<?xml version="1.0" encoding="utf-8"?>
<android.support.constraint.ConstraintLayout
xmlns:android=http://schemas.android.com/apk/res/android
xmlns:app="http://schemas.android.com/apk/res-auto"
xmlns:tools="http://schemas.android.com/tools"
android:layout_width="match_parent"
android:layout_height="match_parent"
tools:context="com.example.mamikutoi.myapplication.MainActivity">
※上記までConstraintLayoutを使いLayoutEditorでドラックアンドドロップによって簡単にレイアウトを作成できる様指定
<TextView
android:layout_width="wrap_content"
android:layout_height="wrap_content"
android:text="Hello
World!"
app:layout_constraintBottom_toBottomOf="parent"
app:layout_constraintLeft_toLeftOf="parent"
app:layout_constraintRight_toRightOf="parent"
app:layout_constraintTop_toTopOf="parent" />
※TextView
を作りHello
Worldを表示
</android.support.constraint.ConstraintLayout> ※ConstraintLayout終了
2.TextView配置のタグ
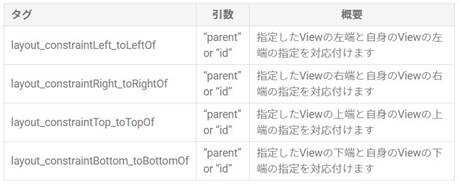
配置の詳細はhttp://blog.techium.jp/entry/2017/02/27/194714参照
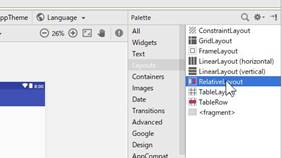
3.画面へ部品を配置する。今回はrelativelayout(相対配置)を使ってみる。
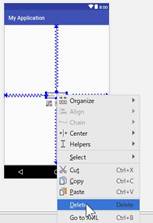
①現在のTextviewを右クリックし削除する。Text画面も自動的に削除される。
②relativelayout(相対配置)を設定する。
・Design→Palette→LayoutsからRelativeLayout選びレイアウト面へドラッグする。
③各部品の名称、幅、高さなどはattributes欄=属性欄で編集。Textでも可能。
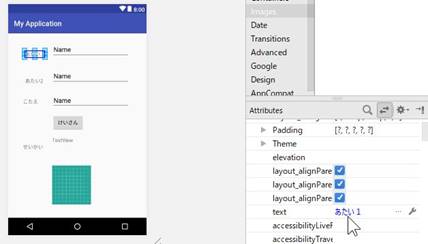
4.レイアウト(最低限必要な)完成図
Run”app”でエミュレーションで表示